Donnerstag, 3. Oktober 2013

Serializing Arrays and Alignment in CUDA

Perhaps you have to deal with message buffers in general or serialized arrays of mixed types, i.e., different arrays packed together into a generic char buffer array on host side and then unpacking on device side again. There you have to take care about aligning the data right, otherwise kernel launches will fail due to misaligned memory accesses. A 64-bit address is only allowed to start at multiples of 8 bytes.

If there is a char array with packed data in this order:

[3x int, 12x double]

... then misalignment takes place. The double starts not at a 64-bit aligned address. Launching a kernel which unpacks the buffer will fail. cuda-memcheck helps you out by this hint:

========= Invalid __global__ read of size 8
=========     at 0x00000248 in kernel(char*, unsigned int)
=========     by thread (0,0,0) in block (0,0,0)
=========     Address 0x500340004 is misaligned


You can place the data in descending order according to the type size:

[12x double, 3x int]

So remember about aligning next time (also pointing at me!).

If you just come here to see some old-fashioned serialization in action, here you get it:


//nvcc -O2 -m64 -gencode arch=compute_30,code=sm_30 mwe_char.cu
#include <stdio.h>
#include <cuda.h>
#include <cuda_runtime_api.h>
#include <device_launch_parameters.h>
#include <driver_types.h>


#define HANDLE_ERROR(err) __handleError(err, __FILE__, __LINE__)
#define HANDLE_LAST(msg)  __handleLastError(msg, __FILE__, __LINE__)

void __handleError( cudaError err, const char *file, const int line )
{
  if( cudaSuccess != err) {
    fprintf(stderr, "%s(%i) : Runtime API error %d: %s.\n",
                file, line, (int)err, cudaGetErrorString( err ) );
    exit(-1);
  }
}
void __handleLastError( const char *errorMessage, const char *file, const int line )
{
  cudaError_t err = cudaGetLastError();
  if( cudaSuccess != err) {
    fprintf(stderr, "%s(%i) : CUDA error : %s : (%d) %s.\n",
            file, line, errorMessage, (int)err, cudaGetErrorString( err ) );
  }
}

/*
 *
 */
__device__ __host__ int toBuffer(char* buffer, unsigned var, unsigned long long llvar)
{
  unsigned long long* ptr0 = reinterpret_cast<unsigned long long*>(buffer);
  unsigned* ptr1 = reinterpret_cast<unsigned*>(buffer+sizeof(unsigned long long));

  *ptr1 = var;
  *ptr0 = llvar;
  return 0;
} 
/*
 *
 */
__device__ __host__ int toVars(char* buffer, unsigned* var, unsigned long long* llvar)
{
  unsigned long long* ptr0 = reinterpret_cast<unsigned long long*>(buffer);
  unsigned* ptr1 = reinterpret_cast<unsigned*>(buffer+sizeof(unsigned long long));
  //printf("Addresses: %p %p\n", ptr0, ptr1);

  *var = *ptr1;
  *llvar = *ptr0;
  return 0;
} 
/*
 *
 */
__global__ void kernel(char* buffer, unsigned size)
{
  unsigned id = threadIdx.x + blockDim.x*blockIdx.x;
  unsigned var = 0;
  unsigned long long llvar = 0;
  if(id>0)
    return;

  for(unsigned k=0; k<size; ++k)
    printf("%u ", buffer[k]);
  printf("\n");

  int err = toVars(buffer, &var, &llvar);

  if(err)
   printf("Error %d.\n", err);
  else
  {
    printf("CUDA: %u %llu\n", var, llvar);
  }
}
/*
 *
 */
int main()
{
  unsigned var = 42;
  unsigned long long llvar = 123456789123456789;
  const size_t BUFFER_COUNT = sizeof(unsigned) + sizeof(unsigned long long);
  char* buffer = new char[BUFFER_COUNT];
  char* dbuffer = NULL;
  int err = 0;
  printf("Vars: %u %llu\n", var, llvar);
  // --- CPU ---
  err = toBuffer(buffer, var, llvar);
  if(err)
    return err;
  var = llvar = 0;
  err = toVars(buffer, &var, &llvar);
  if(err)
    return err;
  printf("CPU: toVars(): %u %llu\n", var, llvar);
  // --- CUDA ---
  HANDLE_ERROR( cudaSetDevice(0) );
  HANDLE_ERROR( cudaMalloc((void**)(&dbuffer), BUFFER_COUNT*sizeof(char)) );
  HANDLE_ERROR( cudaMemcpy(dbuffer, buffer, BUFFER_COUNT*sizeof(char), cudaMemcpyHostToDevice) );
  kernel<<<1,1>>>(dbuffer, BUFFER_COUNT);
  HANDLE_LAST("Kernel launch failed.");
  HANDLE_ERROR( cudaFree(dbuffer) );
  HANDLE_ERROR( cudaDeviceReset() );
  delete[] buffer;
  return 0;
}

Samstag, 18. Mai 2013

Planet Gravitation Map Simulator

Screenshot CUDA / OpenGL Demo of Gravitation Map Simulator
This is just another fun demo for CUDA and OpenGL. It is a slightly modified version of the so called "random oscillating magnetic pendulum" (ROMP). A pixel represents a start position of one particle. This object becomes attracted by all the planets around due to their gravity. After a while the object is going to hit a planet. Now that corresponding pixel gets the color of that planet. You see an evolving map of "gravity" structures in realtime (more or less *cough*).


Download: (tested on Linux and Windows (VS2010), needs CUDA, OpenGL, GLUT, GLEW)

Download Source Code v1.1
Download Source Code v1.0


Positions and masses of the planets can be changed by the user as well as the scale of the map.

The simulation uses Euler or Runge-Kutta integration method for solving the differential equation. It is also possible to use doubles instead of floats for better precision.

The idea for this demo comes from a friend, he also implemented the algorithm in processing. I ported this to CUDA, so the stuff is entirely computed and rendered on the GPU. You need a Nvidia CUDA capable GPU for that.
Screenshot 2.1, different coloring
Screenshot 2.2

Computation

Given a particle at position $ \vec{y}(t)=\left(x(t), y(t)\right)$ at a time t. This particle has a (positive) mass m. In our space there are n planets with their fixed positions $ \vec p_1,\ldots,\vec p_n$ and (positive) masses $ m_1,\ldots,m_n$.
The following equation represents the gravitational force of planet i acting on our particle. This force comes from Newton's law of universal gravitation:

$\displaystyle \vec F_i = G\frac{m_i\cdot m}{r_i^2}\vec e_{r_i}$
G is just a gravitation constant and can be neglected for our purposes. r is the distance between the particle and the planet, $ \vec e_r$ is the force direction vector:
$\displaystyle \vec e_r = \frac{\vec p_i - \vec y}{\Vert \vec p_i - \vec y\Vert}$
Hence, there is the following force at a time t:
$\displaystyle \sum_{i=1}^n\vec F_i(t) = \sum_{i=1}^n m\cdot \frac{m_i\cdot\left(\vec p_i - \vec y(t)\right)}{\Vert\vec p_i-\vec y(t)\Vert^3}$
Newton's second law gives the equality:

$\displaystyle \vec F=m\cdot\vec a\Rightarrow \sum_{i=1}^n\vec F_i(t) = m\cdot \frac{\mathrm d^2 \vec y(t)}{\mathrm dt^2}$
The mass m of the particle can be eliminated in the equation. This ordinary differential equation system of order 2 need to be integrated two times to obtain the position function:

\begin{displaymath}\begin{split}\vec v(t) =& \frac{\mathrm dy(t)}{\mathrm dt}=\i...
...c y(t) =& \int\limits_0^t \vec v(\tau)\mathrm d\tau \end{split}\end{displaymath}    

This integration can be solved numerically, e.g. by Euler's method:

\begin{displaymath}\begin{split}\vec v_{k+1} =& \vec v_k + h\cdot\sum_{i=1}^n\fr...
...y_k\Vert^3}\\ \vec y_{k+1} =& \vec y_k + h\cdot v_k \end{split}\end{displaymath}    

with $ y_k{=}y(t_k),\, v_k{=}(t_k),$ and $ y(t_0){=}y_0,\, v(t_0){=}v_0$ as the initial values. h is the size of every step and v represents the velocity of the particle.


Here you see some videos, which are showing the simulation more or less in realtime.


More:
Article by Ingo Berg, 2006, on magnetic pendulum with implementation (using Beeman's algorithm):
http://www.codeproject.com/Articles/16166/The-magnetic-pendulum-fractal

Mathematica implementation:
http://nylander.wordpress.com/2007/10/27/magnetic-pendulum-strange-attractor/

Some more stuff, videos:
http://magnetmfa.wikispaces.com/pendula?responseToken=05ae0f7708a5c4c989455051dc970f570
http://www.youtube.com/watch?v=duy8s8C7-Uc
http://www.youtube.com/watch?v=QXf95_EKS6E

Freitag, 26. April 2013

Raycasted Spheres and Point Sprites vs. Geometry Instancing (OpenGL 3.3)

Source code of sphere_shader examples (raycasted spheres and mesh-based spheres) written in OpenGL 3.3. Code also includes handy camera, shader classes and (GPU) timer functions based on glQueryCounter. Tested on Linux and Windows.

Dependencies: OpenGL, GLEW, and FREEGLUT and glm.

Download source code:
https://github.com/tdd11235813/spheres_shader
(Update: 2016/03/12 - refactoring of code framework)
http://tubafun.bplaced.net/public/sphere_shader.zip
(Update: 2013/05/21 - added: common shaders with VBO and duplicated parameters)

Developing the QPTool I was interested in the performance of the different types of sphere visualizations.
  1. Spheres with Geometry Instancing (mesh-based)
  2. Sphere Impostors with hardware based Point Sprites (GL_POINT_SPRITE_ARB)
  3. Sphere Impostors with Geometry Shaders
  4. Sphere Impostors with common Shaders (Parameters via TBO)
  5. Sphere Impostors with common Shaders (Parameters duplicated in VBO)

Mesh-based Spheres


The first implementation uses mesh-based spheres by the help of geometry instancing [2]. In the initialization a sphere mesh is sent down to the GPU. By glDrawElementsInstanced(...) the object geometry gets cloned many times. A shader places these objects into the scene. Usually this is a good improvement for visualizing a massive amount of same (complex) geometry. In our case there are two disadvantages:

  1. Meshes are a visible inaccurate approximation of the spheres.
  2. Polygon data increases with the resolution of the spheres, slows down the application regardless of the screen resolution.

In this picture you see in the bottom part the artifacts by the polygon approximation of the spheres. The upper two parts show raycasted sphere impostors (screenshot from QPTool v0.9.7).

Sphere Impostors by Raycast-Shaders


These two pictures are from the sphere_shader examples. First picture shows the mesh-based spheres and the second one the impostors.


If we want to use shaders to render the spheres in the fragment shader on our own, we need a billboard.
A billboard is a flat object, usually a quad (square), which faces the camera. [3]
This quad must be generated with texture coordinates before we can use it. A good explanation can be found here [4]. There are several ways to achieve this. It is possible to use hardware based point sprites, where for each vertex a billboard is created. In the vertex shader you just have to set the point size, which makes up the billboard size later. There are some issues with compatibility and correct visuals. If you take the particles demo from CUDA SDK, where this rendering method is utilized, you might notice wrong quad sizes, especially when the quads move to the borders of the screen. I tried to fix that, but there are still some glitches.

Another possibility uses geometry shader. Dummy vertices (one per sphere) are sent down to GPU and the geometry shader creates four vertices making the billboard for one sphere.

The last way would be sending four vertices per sphere with predefined texture coordinates down to the GPU. By this either a second data buffer is needed for the parameters OR all the parameters are duplicated (4x) in the vertex buffer object.

One disadvantage of the implemented sphere impostor shaders is, Early depth test is not possible, since z-buffer is computed in fragment shader.

Results


Setting: 800x600
Hardware: GPU Nvidia GTX 470 (Fermi), CPU Intel Quad Core i7 @3.07GHz, 12GB RAM
OS: Windows 7 64bit
Number of spheres: 100,000
Parameters per sphere: Position (4 floats), Color (4 floats), Radius (1 float)
Frames measured after warmup: 200

Benchmark Results of Rendering Methods for Spheres (in ms)
FOV = 60
MethodAvg1Avg2Min1Min2Max1Max2
Sphere Geometry Instanced121.5230.013121.1730.006122.1340.023
Sphere Billboard Quads (TBO)7.0800.0226.9380.0177.2010.029
Sphere Billboard Quads (VBO) 1.8790.0021.8740.0011.8860.003
Sphere Impostor Geometry Shader1.9150.0011.9000.0011.9330.002
Sphere Point Sprites, with Glitches :(1.5410.0011.5010.0011.6190.002
FOV = 20
Sphere Geometry Instanced121.6060.015121.0810.003122.0830.027
Sphere Billboard Quads (TBO)8.3200.0238.2910.0198.3590.031
Sphere Billboard Quads (VBO) 8.2300.0018.2270.0018.2340.001
Sphere Impostor Geometry Shader8.2290.0018.2240.0018.2430.001
Sphere Point Sprites, with Glitches :( 7.7560.0017.7520.0017.7630.001
FOV: Field of view. The lower the value, the more sphere-pixels have to be drawn. It is like zoom.
***1: Value for whole frame in ms.
***2: Value for binding and shader config in ms.

Sphere Impostor Geometry Shader: Takes 1 dummy vertex, creates 4 vertices for billboard on the fly.

Sphere Billboard Quads: Takes 4 vertices with preset texture coordinates for billboard. Uses either texture buffer object (TBO) for sphere parameters or parameters which are duplicated (4x) as vertex attributes in the vertex buffer object (VBO).

Sphere Geometry Instanced: Polygon representation of sphere. Using geometry instancing.

Sphere Point Sprites. Hardwarebased Billboard generation (point sprites). Alas, there are glitches and incompatibilities, so I do not recommend to use this.

My current implementation uses the geometry shader method, because it has no glitches so far and it is fast. Nevertheless I would recommend to use predefined billboards with duplicated data, since you will not find geometry shader support "everywhere".

On Linux with a Kepler GPU I obtained following interesting results:

Setting: 800x600
Hardware: GPU Nvidia GTX 670 (Kepler), CPU Intel Quad Core i7 @3.4GHz, 8GB RAM
OS: Linux Kubuntu 12.04
Number of spheres: 100,000
Parameters per sphere: Position (4 floats), Color (4 floats), Radius (1 float)
Frames measured after warmup: 200

Benchmark Results of Rendering Methods for Spheres (in ms)
FOV = 60
MethodAvg1Avg2Min1Min2Max1Max2
Sphere Geometry Instanced50.9430.00350.3700.00153.1170.013
Sphere Billboard Quads (TBO)1.0870.0031.0690.0011.1590.010
Sphere Billboard Quads (VBO)1.0610.0011.0590.0011.0640.002
Sphere Impostor Geometry Shader1.0660.0011.0630.0011.0690.003
Sphere Point Sprites, with Glitches :(0.8970.0010.8950.0010.9020.003
FOV = 20
Sphere Geometry Instanced50.7980.00450.3560.00153.4870.015
Sphere Billboard Quads (TBO)6.1910.0016.1370.0016.7470.008
Sphere Billboard Quads (VBO)6.1330.0016.1300.0016.1370.003
Sphere Impostor Geometry Shader6.1210.0016.1160.0016.1270.002
Sphere Point Sprites, with Glitches :( 5.4420.0015.4400.0015.4460.002
FOV: Field of view. The lower the value, the more sphere-pixels have to be drawn. It is like zoom.
***1: Value for whole frame in ms.
***2: Value for binding and shader config in ms.


Please leave a comment, if you encounter bugs or know more or if you have other ideas.


[1] - http://www.arcsynthesis.org/gltut/Illumination/Tutorial%2013.html
https://web.archive.org/web/20150215085719/http://www.arcsynthesis.org/gltut/illumination/tutorial%2013.html
[2] - http://wiki.delphigl.com/index.php/shader_Instancing
[3] - http://nehe.gamedev.net/article/billboarding_how_to/18011/
[4] - http://www.sunsetlakesoftware.com/2011/05/08/enhancing-molecules-using-opengl-es-20

Mittwoch, 17. April 2013

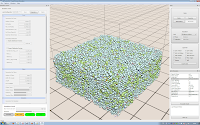
QPTool - A swelling process simulator running on GPU (CUDA, OpenGL)

This post is about my recent work. A swelling process simulator (german: Quellprozess) with glass fibers. The project is running at the IKGB Department of the University of Freiberg (East Germany). I have been working mostly on my own, doing this besides of my master study for one year and it makes a lot of fun. The simulator is open source, licensed under GPL v3, so you can grab the source from git (qptool). At the moment third party libraries are not provided, but they can be obtained from the web. I will post a running application here, when v1.0.0 is released.

The swelling process is driven by 'expanding' hydrogen gas bubbles within the fluid concrete. It is a part of the production process of the AAC, a really versatile, lightweight, cheap precast building material. That hydrogen gas is triggered by a really small amount of aluminium powder in the raw mix. The gas can escape later and in the end the pores contains just air.

To improve the properties of the AAC, (alkali-resistant) glass fibers will be added to the raw mix. The swelling process will distribute the fibers. The simulation helps to understand the movements and directions of the fibers from beginning to the end of the whole swelling process.

QPTool is written in C++, Qt 4.7.4, CUDA 5.0, OpenGL 3. The simulation and visualization is completely done on the (Nvidia) GPU. This gives a good framerate even for medium sized simulations (131k Spheres, 8k Fibers at ~16 FPS). The pores are just expanding spheres, following the Cherrypit Model. The fibers are just lines in the simulation colliding only with spheres (no fiber-fiber interaction), since the glass fibers are very thin.

Renderer:
  • Simple Raycast-Shader (e.g. Spheres are computed in Shader)
  • Multipass Raycast-Shader with Shadows and Edge Filter
  • Geometry Renderer (using instancing technique, but it is slower and uglier than simple raycast-shader)
Simulation
  • CUDA driven physics engine
  • Using uniform space subdivision (based on SDK example 'particles' from Nvidia)
  • Slice-cutting computation (simulates cutting of the concrete block)
  • User can create fiber clusters with preferred directions
  • Real-data based and generic distribution of end radii of pores
Analysis
  • Distribution of pores and fibers
  • Radii of pores
  • Fiber directions (phi/theta diagram)
  • ...
Tools
  • Recording long-term simulations into video alongside with statistics
  • Benchmark tool to compare algorithms
  • Export simulation data to csv for further processing
  • Import simulation data
  • Session and simulation setting management
  • ...

Just some pictures:

Comparison Shader vs. Geometry
Fiber Clusters
Simulation
QPTool v0.9.7
Radius Distribution
Slice cutting the block


Credits:
- S. Matthes: My boss :) He does the higher mathematics and experimental investigations for this simulation. Thanks for all the great discussions and for giving me this opportunity.
- Prof. B. Steinbach, allowing me to use an office room for free (including Desktop PC with Nvidia GPU of course :) )
- Nvidia, CUDA, Simon Green, SDK Demo 'particles'.
- Qt (used Qt 4.7.4), Qwt, Qxt / libqxt
- CAviFile Class, Xvid Encoder used for recording tool (video rendering)
- ...

Further sources which I used or adapted or helped me to understand the things better
- FastDelegate
- PixelBufferObjects Class
- Camera Control Class
- several tutorials over the web about OpenGL buffer objects, renderbuffer, framebuffer, shader instancing, shadows shader, ... (take the appropriate buzzword and google it)
- Christian Sigg (GPU-Based Ray-Casting of Quadratic Surfaces)
- Article on Molecules: Enhancing Molecules using OpenGL ES 2.0
- ... and many more ... :)


v0.9.7 still has some bugs and cylinder impostor shader is not finished yet.